
Arduino first steps
Here you can find a few words about Arduino: review of boards, points of attention for a start and some standard information.
Welcome on board! Arduino board (:
Here I would like to tell you about the Arduino family and my first steps experience there.
Short introduction
How did I came to the idea: we’re visiting our friends, and my friend was demonstrating us elements of smart home withing sharing plans of improvements. Sure, as IT man I was burned by the idea to apply his concepts in my apartment and, sure, I started to research. After a short time, I realized there are tons of ways how to implement them. First of all, there are too many microcontroller’s boards. From Arduino nano, through Raspberry Pi to enterprise solutions. The prices of the solutions are very different. As a result I’ve started from Arduino Mega 2560. A quite cheap microcontroller board and good for research what can I do with it and how.
A few pictures


Popular Arduino boards
There are too many different board types. Let me explain the differences between most popular ones shortly.

- Arduino Nano — differences with UNO are only in design. Nano is way smaller.
- Arduino Mega — the board, is based on a more powerful microcontroller. It has a large number of ports.
- Arduino Micro has built-in support for USB connections and therefore can be used as an HID device (keyboard, mouse, MIDI device).
- Arduino Ethernet can connect to the network via an Ethernet wire. The board also has a slot for microSD cards.
- Arduino Mini — in terms of performance, it is slightly inferior to UNO. The advantage of the board is its small design.
- Arduino Due — board based on 32-bit ARM microcontroller. It has a performance advantage over the others.
- Arduino LilyPad — form-factor allows you to use the board in garments and textiles.
- Arduino Yún has support for Linux distribution, built-in support for Ethernet and Wi-Fi, the slot for microSD. Like Micro, has built-in support for USB connections.
How to start when you already have the board
You can find a huge amount of tutorials on the internet. My first project was “project” with the blinking of the 13’th pin diode. I pretty recommend you to start with it too. Sure, first IDE for experiments is Arduino IDE, you could find it at the official resource.
What I recommend to drow your attention on the next points:
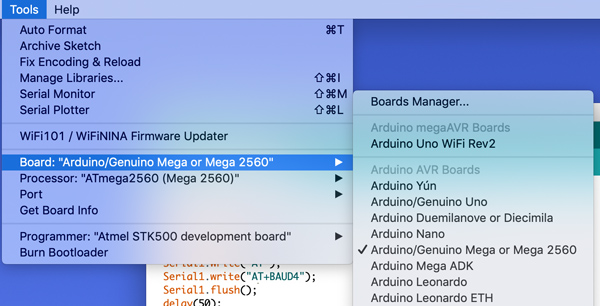
IDE Board Selection
Depends on the type of your device you need to select the right line. Otherwise, you have a chance to get the error during compiling.
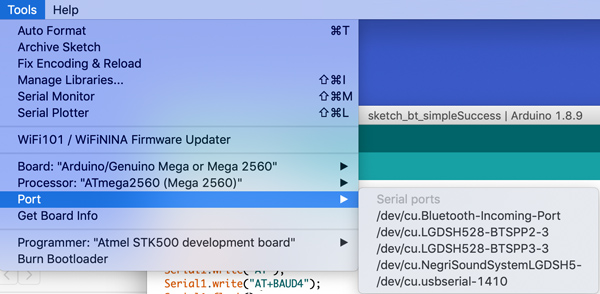
IDE Port selection
Please note, the port was selected correctly. On the mac device normally it’s /dev/cu.usbserial-{digits}. Without that, you wouldn’t be able to upload your sketch to the board.
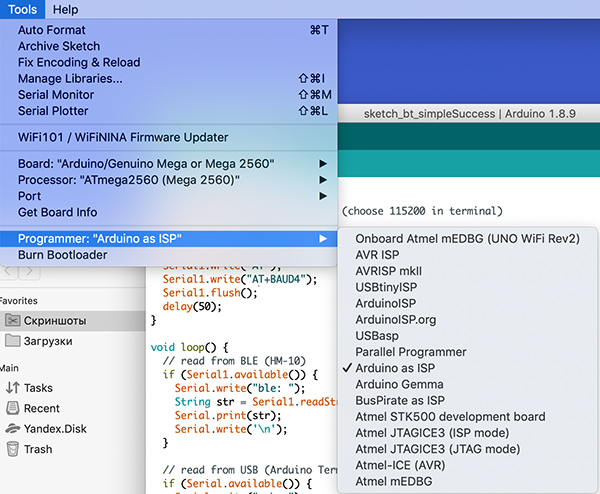
IDE Programmer mode
Type of programmer might be an issue during compilation.
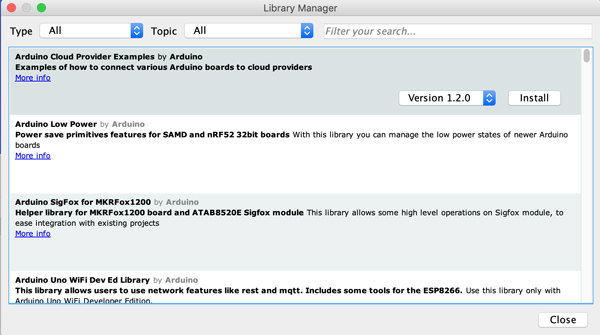
Manager Libraries
If you need extra partly libraries - please use first Tools » Manager Libraries to find and install them without extra headache.
Summary
Good luck in your steps on the way to the Arduino constructions! Here I mentioned fundamental points for Arduino start. In the next posts, I will discover my experience with Arduino in details.
